Course Objective; Students will process materials using hand tools while following these elements of knowledge, skills, strategies, attitudes and perceptions related to the competency
Students will learn, for the competency as a whole:
• Basic technical terminology • Basic hand tools used in this competency: planes, saws, mallets, hammers, wood chisels, squares, files, rasps, pliers, screwdrivers, measuring instruments, etc. • Occupational health and safety: individual protective equipment, equipment safety, ergonomic work posture, etc. • Method for using materials economically • Importance of following the manufacturing process for the object
Specificattitude required for this competency:
patience, in order to persevere in spite of difficulties encountered
Modern Cabinetmakers still use hand saws. Believe it!
Japanese woodwork has had a heavy influence on our hand saws.
So I like to divide our saws into 2 categories.
Western Push Japanese Pull
Dozuki Saw
Dovetail Saw
We use these saws to hand cut joints or do fine work that an electric saw would be too cumbersome to do. The teeth on a saw only cut in one direction. Either western style, while pushing the saw away from you. Or Japanese style, while drawing the saw toward you. Weather you prefer push or pull is up to you.
Both Western and Japanese saws have models which are made to perform either a Crosscut or a Rip
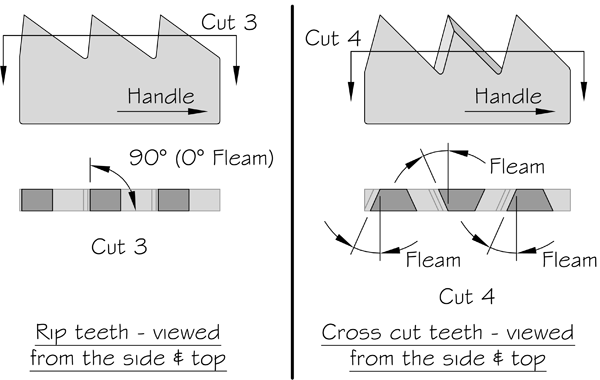
One way to tell the difference is to examine the RAKE
Rip Saws have a rake which is closer to 90 degrees
Japanese Influence on modern Handsaws have reduced the of western saw's set.
Today's saws have a more narrow SET and therefore leave a thinner KERF.
The Japanese saw's teeth have an inward angle on them called the FLEAM.
The fleam is what allows the set to be so narrow and cut so well.
Today it is common to find western handsaws with a fleam.
The other thing that differentiates Rip saws from Crosscut saws is the back.
Back Saws never rip because their back, which is designed to keep the blade rigid, is wider than the kerf they create.
Western Saws
Backless / Rip or Crosscut
Backsaw / Crosscut
Coping / Curved sawing
Keyhole Saw / small places
This Backsaw is a Dovetail Saw. It has a very thin set.
Japanese saws blades are also thinner and more flexible than western saws. However they are much more fragile.
Kataba / Crosscut
Ryoba / Combination Crosscut and Rip
Dozuki / For making Joints
Kugihiki / Flush cutting
Teeth Per Inch
T.P.I. refers to the amount of teeth there are on the saw blade over the distance of one inch. The more teeth per inch the finer the cut. So saws with less TPI are used for fast rough work like big Western rip saws. Contrary, more TPI is typically a dovetail or dozuki saw for precision.
William "Saw" this Ryoba and grabbed it to do some precision ripping.
Now that we have flattened the bottom of our chisels and plane irons, then ground them to 25 degrees on the grinding wheel, it is time to start honing the secondary bevel.
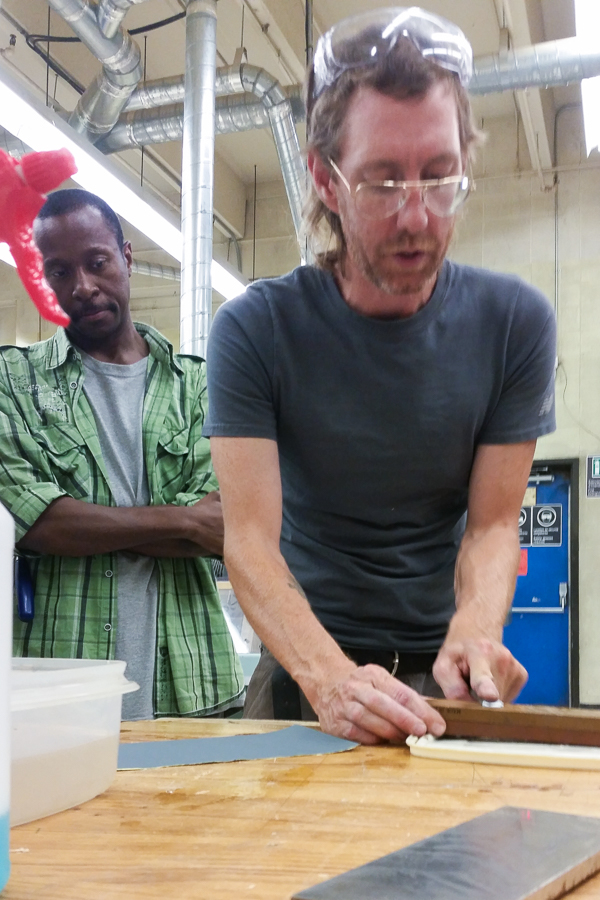
waterstone demonstration
The Secondary bevel is about 30 degrees. It can be achieved by simply lifting the back of the hollow grind 1 mm off the abrasive surface while honing.
The Diamond Stones are Ideal for honing because they are durable. Silicone Carbide sandpaper that was set up for flattening is also a great way to hone a secondary bevel. However it may easily rip.
Demonstrations were done on 3 types of Abrasives
For this demonstration I honed 3 separate block plane irons I had previously ground to 25 degrees. One on Waterstone, one on sandpaper and one on Diamond Stones.
Honing begins @ 320 grit and higher. * U.S. (see previous Grit blog post)
We worked our way up from there to 1200 on sandpaper or highest available on stones.
First we had to find the 30 degree secondary bevel. I did this by demonstrating how the hollow grind sits itself on the stone. Then I lifted the back about 1mm off the stone to find the perfect angle.
By Habit, I hone in a figure 8 pattern. I do this because I often use water stones which wear away (un- flatten) quickly. The diamond stone is tough. So Diamonds are a boys best friend.
We examined the wear pattern on the secondary bevel only after a few laps.
Stop often and examine the wear pattern! This technique is difficult to master at first. If you are not consistent with the honing angle you may wear away the hollow grind. If that happens you will have to return to the grinder and start over.
On Sandpaper I honed by dragging the blade backward or side to side. I did this because plowing into the paper will inevitably tear it. And sand paper does not grow on trees.
You may notice wear patterns on the heal of the hollow grind. Though this is not incorrect, it means you may end up honing through the hollow grind.
Here at the end of the blade we can see the Burr created from the abrasive friction on the point of our tool. When a burr is created I know I have honed enough and it is time to remove it.
To remove the Burr I must turn the blade over and hone it FLAT on the abrasive. The Burr will flip back on the other side. Once this happens, it is time to move up to the next grit and repeat the process. (hone the secondary bevel, then flip and hone flat.
Again, this is a task that takes much practice to master. Returning to the grinder after the 5th time may be the straw that breaks the camels back. So Here at RTC we have some honing jigs to help.
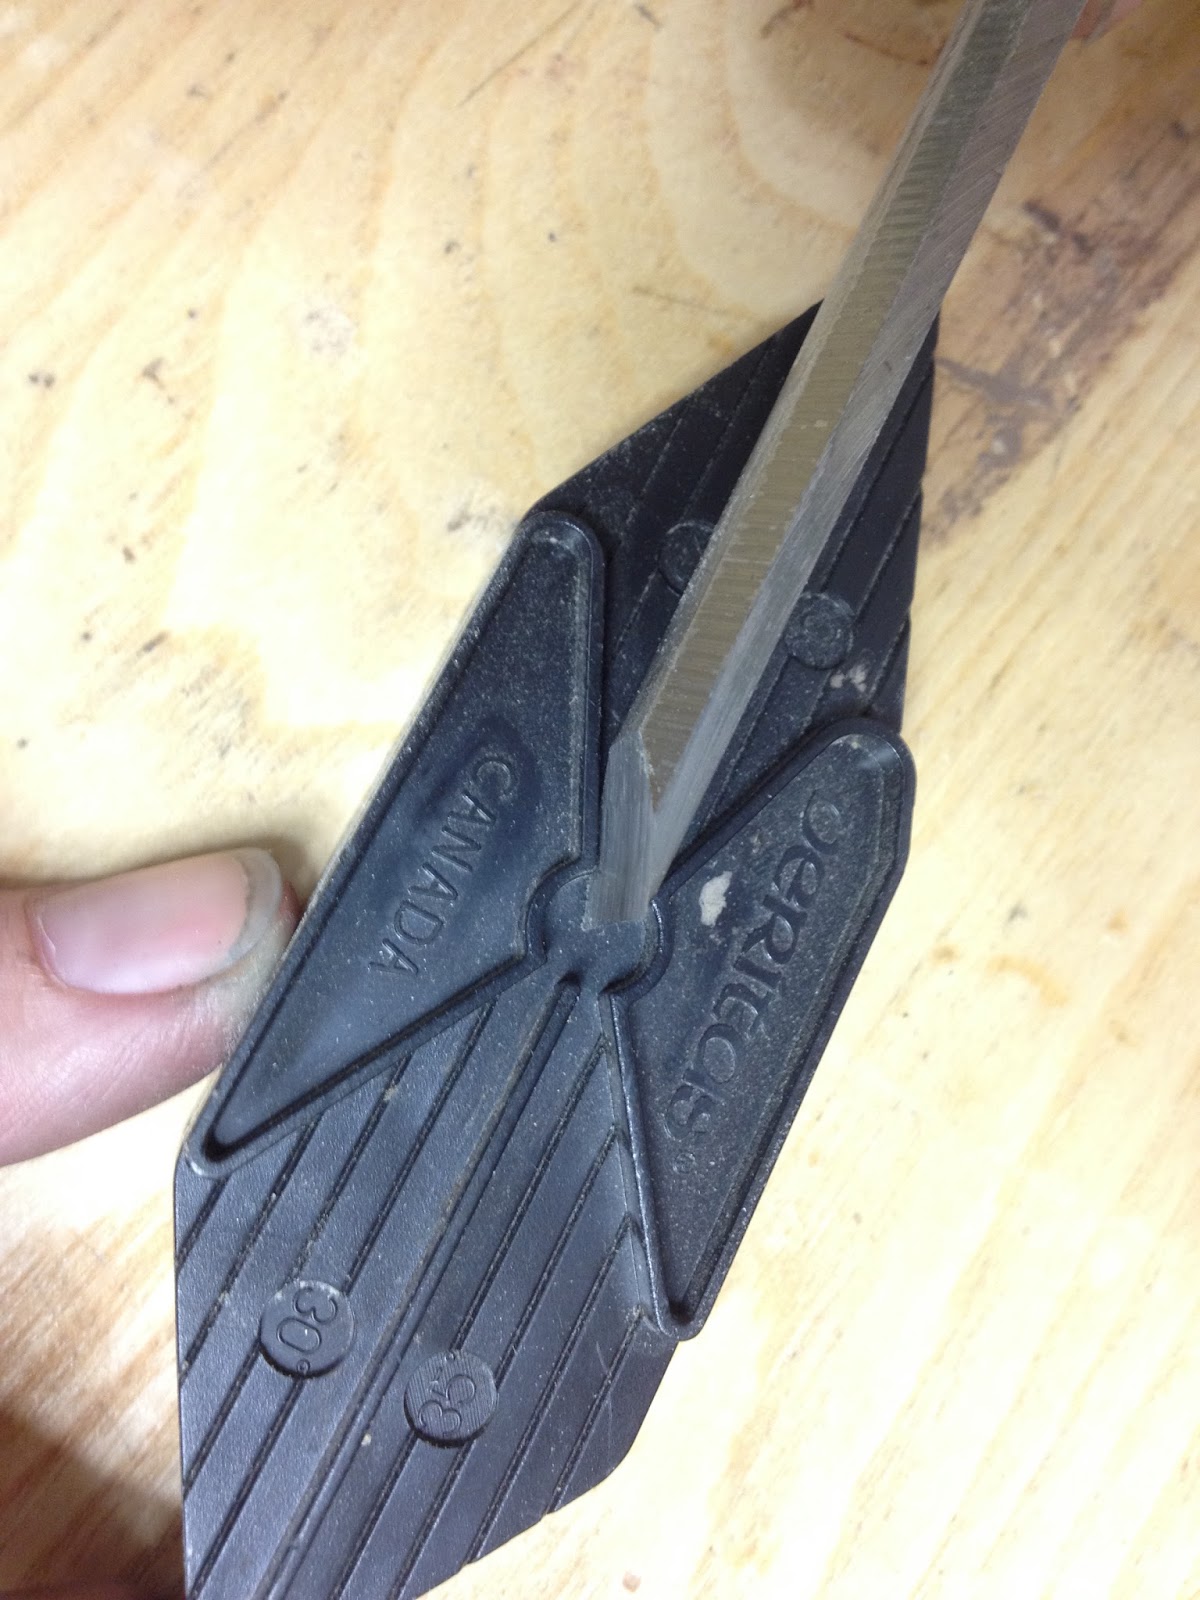
The Lie-Nielsen honing jigs hold the blade at the right angle for you as you work your way up the grits
Orlando wearily tries to see the burr on the end of his chisel. Since all light escapes such a fine point I suggest he uses "the force" instead. After he "honed in on the burr" using his Jedi powers, Orlando then flipped his chisel over and honed it off without having to remove the jig.
It can be done on leather, or using a pumice or stropping compound on wood.
Here at RTC we have a stropping compound and like to rub it on a soft wood like pine. It sticks to the pine and then we can strop our sharp edges backwards on it. Be sure to respect the flat back side of the blade just as you did in the honing process.
If you are sharp. the blade should be able to slice through the end grain of a soft wood like pine without trouble. Just like Mathieu
A sharp blade will leave a "wet" looking surface on the end grain if it is scary sharp!
Justin hits a home run with his chisel sharpening skills
Performance
These shavings are so thin they are translucent.
Attitude and Craftsmanship
The fine point and perfectly polished surface of our tools must be maintained throughout this course and you career as a craftsman. metal clanging together in our toolboxes will ruin all our hard work and reduce the performance of our tool. Using a dull tool is a safety issue. Placing our planes down on their side and chisels upside down are good habits that craftsmen and women exercise.
Today, I decided to spend my Sunday afternoon looking for hand planes. Ever since Module 5 started, I have been in constant search for chisels and planes. The three main sources I’ve been combing have been thrift stores, Kijiji and Craigslist. Thrift stores (just like garage sales) are a give-or-take situation, mainly because it depends on who is selling their stuff. I rarely find tools in thrift stores, which are mainly a good source for kitchenware and clothing. Craigslist and Kijiji, on the other hand, can narrow down your search easily. From the past few weeks of my search, I have only found two or three ads for smoothing planes, most of which vary from $35-70 each. Ontario listings seem to have more people posting ads selling their old hand tools; Montreal in comparison is scarce.
I have worked at thrift stores and antique stores before, even acting as a buyer for my friend’s Antique store Salmagundi West in Vancouver. One place I always went to to find specific antiques is Marché Aux Puces St. Michel. This place is huge. I have found a variety of rare items here before, like 1920’s light fixtures, a medium-format Yashica film camera, a 1940s-vintage doctor’s leather case and some dentures from the 1800’s. Yes— anything you can imagine being left behind from the past, you can dig up here.
The first time anyone ever goes inside this flea market is overwhelming. So I’m telling you now, if you decide to come here, be prepared to have your energy drained if you’re not ready to spend a whole afternoon here. It’s just a few minutes walk away from our John F. Kennedy Campus /RTC garage door, right before you hit the Trans-Canada Highway. There are two floors and many kiosks. Each kiosk is run by a buyer/seller who have items that can either provide specific specialty items like tools, old medical antiques, cameras, etc, to just plain everything. Prices also vary widely, and bargaining is a must, don’t be shy about haggling. Note: they only take cash here. If you forget to get cash out, there is an ATM at the gas station across the street.
I came in the flea market with my boyfriend Murray in arm, and $60 in my pocket. I was aiming to get a smoothing plane and a block plane for that price. I always remember to go here with a set budget and a specific item in mind or else my mind will wander and I will end up buying a taxidermied raccoon. So I walked down the aisles, peeking into each kiosk for a tools section. If you see a pile of rusted metal, you’ve found a good place to start. Don’t hesitate to browse quickly, and pass on kiosks which don’t have what you want. If you allot yourself a time of at least 5 minutes per kiosk, you’ve already wasted too much time. Remember, you’re on a mission.
The first plane I found was an old Stanley smoothing plane with a frog assembly. It was rusted and dirty, but that shouldn’t deter you from opening it up and taking a look. (Remember, you can sand off any rusted bits off the steel). I opened it up and saw that it had the chipbreaker, but not the blade. I asked the man how much it was and he was willing to give it for $15. Not sure if I am able to find the blade for that Stanley model, I decided to think about it and keep walking.
As I continued to look around, I decided to just ask one of the sellers if he knew where we could find a kiosk full of tools. “You're looking for a guy name Aldo. Just go straight from here, turn right then left. You won’t miss it.”
We followed his instructions, and before we were even within 50 feet of Aldo’s kiosk, we could see his piles and piles of tools. There were screws, routers, hand drills, saws; power and hand tools, everything you could think of. On one messy shelf, he had four smoothing planes, one jack plane and five block planes! I started going through them, analyzing the damage to see what was fixable and what was not. Since all of them are old hand tools, I had to take them apart. The blade is the most important part: even if rusted, it had to have enough steel for me to use it on the bench grinder. A lot of the block planes barely had any steel left. I also kept in mind that I needed a low-angle block plane. Some of the mechanisms like the screws or levers were rusted shut, others were just too big for my hands. Missing pieces should be a deal breaker since these are old tools. If you think these are hard to find, think of trying to replace a specific piece. Don’t forget to test the feel of each; seeing the weight and the ergonomics of each tool. Is it comfortable? Is it easy to manage when you're using it?
After I considered which planes I would take, I also managed to find a carpenter’s square, an old tape measure with 1/16th ticks (and no fraction labels!) and a bevel gauge. He gave everything to me for $30! Quite a steal. I told him that I was attending Cabinetmaking in RTC and he told me to send him more of my classmates. Remember to look for Aldo.
Before we left, we stopped by one place with lots of tools spread around shelves and found a heavy-duty vise. I had $30 left in my pocket so I bartered to get it for $20 but he asked for $30 instead. We shook hands at $30. Bartering is key. All in all, I spent all of my budget, but considering how much I got, I’d say I hit jackpot. On the way out, I passed by the man I asked earlier about tools. What I didn’t see was that he had two hand planes in plain sight! I asked him how much he would sell them for and he said $10 each. I told him I would send some classmates over.
The complete haul, as they were when we got home. Four of the pieces have significant surface rust, but that’s easy to remedy.
After I arrived home, I spread a drop sheet on my kitchen table and began to restore, starting with the block plane. I used WD-40 to loosen the gunk off of everything. I used wet/dry sandpaper ranging from 80–600 grit to grind off the rust and crust off the blades and soles, working from the lower grits up. Instead of water, I used silicone-based bicycle lubricant to work with, treating the steel and making sure to use it for finishing and rustproofing. One great thing about using bicycle lube instead of machine oil like 3-in-1, is that it does not attract dust. * good idea!
The low-angle plane, before and after, from above.
The low-angle plane, before and after, from the side.
The low-angle plane’s shoe, before and after.
The low-angle plane’s blade, before and after.
An engineer’s square, before and after corrosion removal.
I then began to work on the smoothing plane. This was completely covered in rust, but just by using an 80 grit sandpaper, I managed to clean it and was able to see silver after only 5 strokes.
Ehrmahgerd. !
“You are sooo beautifuuuul, to meeeeee”
The handles had thick blue paint that was chipping and faded. So unscrewing them, Murray decided to help me sand them off. The S handle had thicker old paint so he used a heat gun to strip the paint. It bubbled right off and he used a scraper to clear it off.
The handles after stripping, one coat of stain, and sanding with 150-grit dry sandpaper.
After sanding both again, he stained it with some Minwax water-based stain with a custom blue tint (Tardis Blue!) and did four coats before letting it dry and re-attaching it back on the smoothing plane. The last two coats were applied by dipping the handle right into the stain and letting the excess run off back into the can, until the last bit was wiped off with a paper towel.
I still need to take the blades to the bench grinder to get the 25° angle and to hone it after, but the hardest part is finished. They are now cleaned and polished.
Before and after. Schmexy.
WOW!
In one afternoon, I managed to find and restore some hand tools which will last a long time in my hands. Being able to get to know your tool is important. Working on bringing one back to life really gives you and your tools a bond. I’ve already named my purple block plane Prince
*I believe this is the proper spelling
(…the artist formally known as). Now that I have taken it all apart and put it back together; ground, lubricated and shined, I know every single piece; where it goes and how to assemble it. Get to know your tools. Respect your tools and it will give you outstanding results. So go on and start your search, you’re on a mission (like Jake and Elwood). Remember to have a set budget, bid low, and do not hesitate to disassemble the tool before buying. Happy hunting! A penny shaved is a penny earned!
Having a level backside is essential to getting the correct angle for using a grinding wheel, and for accuracy once sharpened. (I'm not sure if we can use the grinding wheel even if our tool isn't level?)
Not really. I think the proper term is flat. Level means parallel with the ocean. The Backside must be flat because
We will use this side as a register when tooling
To achieve a perfect point for scary sharpness. If the back isn't perfectly flat, it will be difficult to remove the burr during the honing process.
Ensure that the back of the tool is Flat by grinding it on your choice of medium, starting with a very low grit and working up. If the tool is fairly clean and only a little uneven, start at about 320 and workup, if there's a lot of gunk on it, start lower, about 50-80 and work up to 1200 or more.
Rosen's medium of choice is a course diamond stone.
Sand paper was taped to a sheet of melamine for fine lapping. We used grits 320,400,600,800,1000 and finally 1200
Pete and Ahmed watch me demonstrate with my Waterstone
We're checking for an even light reflection, the tool should be shiny and flat. Patches where the light doesn't hit, or doesn't hit evenly means you need to keep going. Aim for perfect Flatness on the lower grits and use the higher grits to reduce the scratches. During this process be sure to keep the tool flat, you don't even have to hold the handle of a chisel.
William brought in an old rusty smoothing plane. Old Stanley planes like these are easy to find and are easily tuned up.
First he had to flatten the soul of the plane
When creating a smooth surface on a hand-plane, it only has to be flat on all four edges of its sole, it's okay if there's a slight indent in the middle section.
Smoothing down a hand plane is hard work but when done right and treated with care, the grind can last decades with only the occasional ten minute tune-up.
Lapping grits are available and should be used on a hard flat surface such as glass
But we seem to get quicker results with sand paper
80 Grit silicone carbide seems to do the trick for Marissa's cool antique block plane
Grinding the perfect hollow grind using a Grinding Wheel
This is the ideal hollow grind, shown on the edge of a hand plane blade.
Grinding using a grinding wheel creates a concave shape known as a hollow grind, this shape makes it really easy to cut since the point of contact with the wood is directed onto the tip of the chisel.
For safety reasons, tie hair back, remove jewelry, tuck in your shirt and wear safety glasses.( Belts?)
we are grinding the ends of our plane irons and chisels square
If the tool is very damaged, for example dented, you'll want to set the grinding wheel at a 90 degree angle. Then use a sharpie to mark a line straight across using a Square or engineering square.
You want the line be drawn just below the imperfections. Grind by eye until you've removed the damaged part, and check for square.
Set a grinding wheel tool rest to 25 degrees (for the average chisel and plane iron) and lightly grind the edge along the wheel, moving left and right if the chisel is wider than the grinding wheel.
No jewelry, shirt tucked in, fingers far enough from the tip and not wrapping around. Here Brendan uses his right hand to keep the blade pressed against the tool rest, and he's using the forefinger of his left hand against the base of the tool rest to keep the plane iron ( Blade ) square.
Remember to "cool the tool" constantly by dipping it in water
To accurately verify if you have set the tool rest to 25 degrees, check the blade you are grinding with a bevel gauge or an angle gauge like this one
Hollow Grind
When using a grinding wheel, stop every few strokes and look at the pattern developing on your tool, adjust accordingly to get an even grind all the way across.
Future Article topic: Troubleshooting grinding issues. Look at the very tip of the tool and check to see if light reflects, if it does, you haven't created a point yet, keep going. Every few passes, whet your tool with water. You can never use too much water, but not using enough can damage your tools. "Ask Matt" on Youtube suggests keeping a drop of water on the edge of the tool, and when it begins to boil, whet it again.