Lapping the "Soul"/ Having a Flat back side

Having a level backside is essential to getting the correct angle for using a grinding wheel, and for accuracy once sharpened. (I'm not sure if we can use the grinding wheel even if our tool isn't level?)
Not really. I think the proper term is flat. Level means parallel with the ocean.
The Backside must be flat because
- We will use this side as a register when tooling
- To achieve a perfect point for scary sharpness. If the back isn't perfectly flat, it will be difficult to remove the burr during the honing process.

Ensure that the back of the tool is Flat by grinding it on your choice of medium, starting with a very low grit and working up. If the tool is fairly clean and only a little uneven, start at about 320 and workup, if there's a lot of gunk on it, start lower, about 50-80 and work up to 1200 or more.
Rosen's medium of choice is a course diamond stone.
 | ||
| Sand paper was taped to a sheet of melamine for fine lapping. We used grits 320,400,600,800,1000 and finally 1200 |
 |
| Pete and Ahmed watch me demonstrate with my Waterstone |
We're checking for an even light reflection, the tool should be shiny and flat. Patches where the light doesn't hit, or doesn't hit evenly means you need to keep going. Aim for perfect Flatness on the lower grits and use the higher grits to reduce the scratches. During this process be sure to keep the tool flat, you don't even have to hold the handle of a chisel.
 | ||
| William brought in an old rusty smoothing plane. Old Stanley planes like these are easy to find and are easily tuned up. |
First he had to flatten the soul of the plane
When creating a smooth surface on a hand-plane, it only has to be flat on all four edges of its sole, it's okay if there's a slight indent in the middle section.
 |
| Lapping grits are available and should be used on a hard flat surface such as glass |
 |
| But we seem to get quicker results with sand paper |
80 Grit silicone carbide seems to do the trick for Marissa's cool antique block plane
Grinding the perfect hollow grind using a Grinding Wheel
 |
| This is the ideal hollow grind, shown on the edge of a hand plane blade. |
Grinding using a grinding wheel creates a concave shape known as a hollow grind, this shape makes it really easy to cut since the point of contact with the wood is directed onto the tip of the chisel.
For safety reasons, tie hair back, remove jewelry, tuck in your shirt and wear safety glasses.( Belts?)
 |
| we are grinding the ends of our plane irons and chisels square |


You want the line be drawn just below the imperfections. Grind by eye until you've removed the damaged part, and check for square.

Set a grinding wheel tool rest to 25 degrees (for the average chisel and plane iron) and lightly grind the edge along the wheel, moving left and right if the chisel is wider than the grinding wheel.
 |
| No jewelry, shirt tucked in, fingers far enough from the tip and not wrapping around. Here Brendan uses his right hand to keep the blade pressed against the tool rest, and he's using the forefinger of his left hand against the base of the tool rest to keep the plane iron ( Blade ) square. |
 |
| Remember to "cool the tool" constantly by dipping it in water |
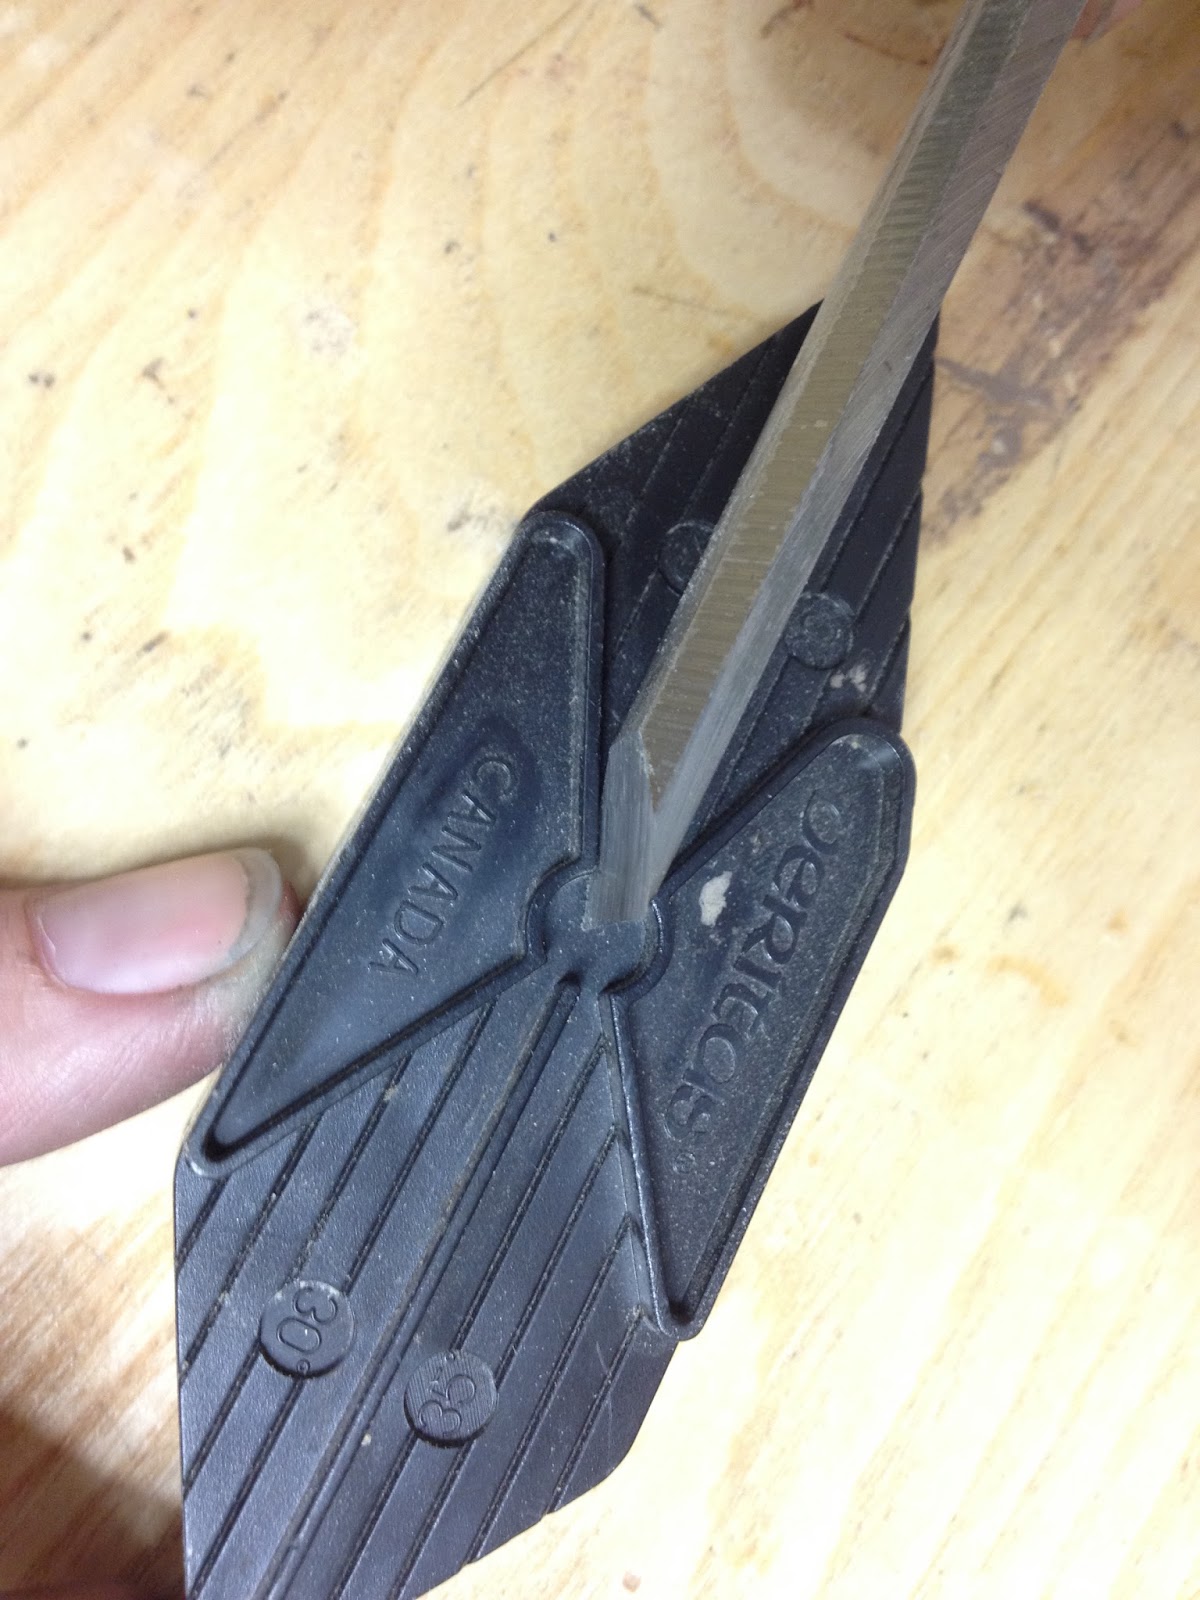 |
To accurately verify if you have set the tool rest to 25 degrees, check the blade you are grinding with a bevel gauge or an angle gauge like this one  Hollow Grind  |
Future Article topic: Troubleshooting grinding issues. Look at the very tip of the tool and check to see if light reflects, if it does, you haven't created a point yet, keep going. Every few passes, whet your tool with water. You can never use too much water, but not using enough can damage your tools. "Ask Matt" on Youtube suggests keeping a drop of water on the edge of the tool, and when it begins to boil, whet it again.
Great Job Marissa!