Course Objective


Course Objective;
Students will process materials using hand tools while following these elements of knowledge, skills, strategies, attitudes and perceptions related to the competency

Students will learn, for the competency as a whole:

• Basic technical terminology
• Basic hand tools used in this competency: planes, saws, mallets, hammers, wood chisels, squares,
files, rasps, pliers, screwdrivers, measuring instruments, etc.
• Occupational health and safety: individual protective equipment, equipment safety, ergonomic work posture, etc.
• Method for using materials economically
• Importance of following the manufacturing process for the object

Specific
attitude required for this competency:

patience, in order to persevere in spite of difficulties encountered

Wednesday 23 September 2015

Square up a board / Shooting Board pt.1

Chicken or Egg....  

This Module 5 we decided to make a shooting board. A shooting board is a jig woodworkers use in conjunction with our hand planes to produce square ( or other desired angles ) boards.

We will use Paul Sellers' shooting board design, only slightly altered. However we must produce square stalk  to build the shooting board, hence the chicken or egg dilemma.

So here we go. Practicing on Basswood, students produced a square board 4" wide, 9" long, 3/4" thick using layout tools and hand planes ( SHARP ONES ).

There are six sides to a board and so six steps to square one up.

 Step 1 is to flatten a face.  Andy uses his scary sharp block plane to smooth and flatten the first face of his board.


 He checks for flatness with a straight edge.
Light will appear under the edge where low points occur
Andy then takes his time to analyze where the low points are and planes off where they are not. 

A Flat Board will fall onto a flat surface with a thhhhhump.
You can hear all the air move out of the way as the flat face hits the flat table saw surface in the video below.

And the difference as it knocks around the uneven backside

the layout for step 3 is shown

 
Once the first face is flat,William moves to step 2, Square one edge to the flat face.


 Checking with a square off the flat face, light is visible again on the low points.

Accuracy is only possible with a sharp plane.
One strategy used to obtain our square objective is to shade high points with our pencil and them take them off with our plane.
This targets only the high points.
Don't forget to constantly verify if you are square.

 
Watch Mélanie Target those pencil marks below.


 Step Now that we have completed step 1 and 2, The other sides or steps are really interchangeable.
The reason is because our layout tools will always register from either the first face or first edge made.
 Paralleling from the opposite edge in done with a marking gauge or combo square. This line is 4" from the Original edge. Layout lines can be scored with a knife too. It is more accurate as we can use "THE FORCE" and feel the layout line.  Don't forget to make sure the parallel edge is square with the first face.
step 3 was to parallel the second edge to the first. 

Planing down more than 1/2" can be time consuming and cause one arm to be larger than the other. Safely cutting 1/8" over the layout line with a rip saw will do the trick.


Step 4 Square one end
TEAROUT ALERT!

Tearout often occurs when planing the end of a board.
The end grain is a different beast as we are attacking it perpendicularly. When the blade of our planes exits the edge of the board, the grain may rip apart and cause tearout.

Planing the against the grain or even "Wild Grain" can cause tearout. Another reason to be SHARP!

Strategies to prevent end grain tearout are
  1. Never planing past the center of the end (entering from either side)
  2. Scoring a layout line with a knife or chisel
  3. Clamping more wood at the end where the plane exits the edge.
Almost there. The Scored line is visible here on the end grain.
William verifies one end is square by placing his square on the first edge and face he originally planed


the layout for step 5 is shown


Step 5 With a ruler or tape measure, mark 9" from the end  that was just
squared. Then use a square, a pencil and a knife to mark out the layout 
line. Be sure to always set the square on the original edge or face from 
steps 1 and 2


After sawing off the excess with a crosscut saw, plane down to the layout 
line that was scored with a knife..

Don't forget about tearout!

The second end is 
  1. 9" from the first end.
  2. Square to  the first face
  3. Square to the first edge
Left and in the video below we can see how well some scraps 
clamped to the sides work to prevent tearout.


Step 6 use a  marking gauge and layout 3/4" all around the edges from
the first face. Do so with a pencil and then a knife.  


Then plane down to the marked line around the perimeter.
Be sure the centre is not crowned. If it is, flatten it without 
planing the outside where you already reached your layout
line.   
ET Voila!
Next a shooting board to simplify this task.


to be continued. see pt.2
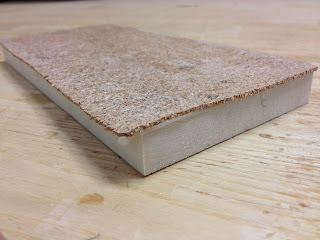
But wait! What happened to that perfectly square block of basswood?


 Well, in the bench vise we glued cork to one face with white glue.
 Then trimmed off the excess with and exact-o blade

Finally, we filed the edges with a Bastard cabinet file

..... And it makes the perfect 1/2 sheet sanding block. :)


No comments:

Post a Comment